Posted on 1 Comment

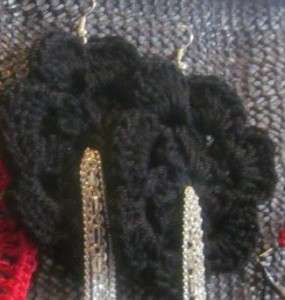
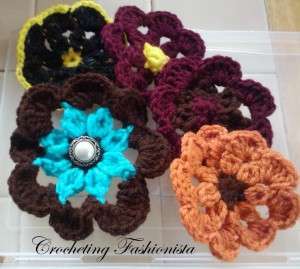
Jess Signature Flower

© Jessica N. King-Cason

What you’ll need:

4ply Yarn and a G Hook the bigger the Hook the Bigger the Flower will be

Tapestry Needle and Scissors

Also: You can use Crochet Thread with 00/3.50mm crochet hook


(Picture of the Flower using crochet thread)

Stitches that will be used in this Pattern

Magic Circle: MC

Single Crochet: SC

Chain: CH

Double crochet: DC

Slip Stitch: Sl St

Main Stitch used!

Bobble Stitch (My Version) Work 4 dc, with each double crochet you do keep one loop from the double crochet, remaining on the crochet hook, then go through all loops at the end of the 4th dc

Let’s get started:

Round 1: Start with a MC, 14sc inside the MC, join

Round 2: ch3, work 3dc into the same stitch, (Remember to keep one st , remaining on the hook from each double crochet) yarn over and go through all loops on the hook.  *Ch 4, skip 1 single crochet, 1 bobble stitch in the next sc*, repeat all the way around , Ch4 join at the beginning of your 1st ch4  (You should have 7 bobbles all together)


Round3: Sc in the ch4 sp, 7 dc in the same ch4 sp, *sc in the next ch4 , 7 dc in the same ch4 space*

*Repeat all the way around * Join in the back of your 1st sc

Draw up a small tail

Cut and weave all ends!

Peace, Love and Happy Crocheting!

Posted on 20 Comments

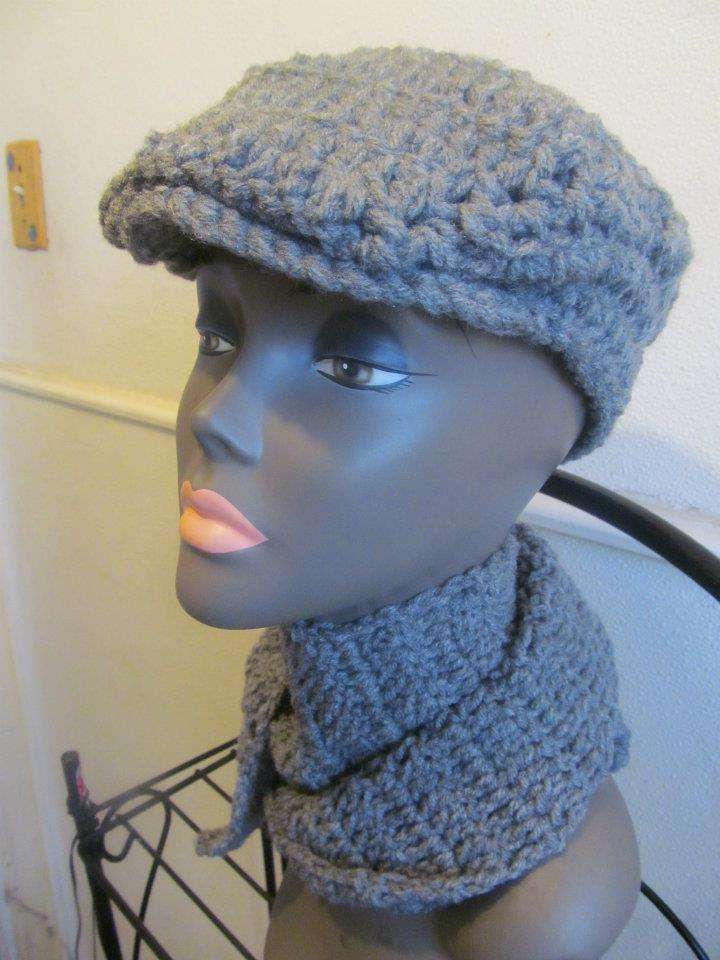
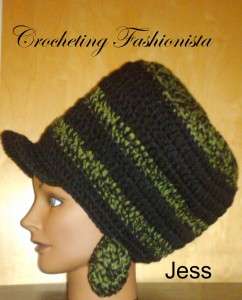
Jess a Crochet Kangol Hat (Pattern)


This is how it looks when you use 1strand of 4ply yarn and using two strands of 4ply for the brim

Personally I like it when I use two strands of yarn throughout the project! The Grey is how two strands of 4ply yarn looks like throughout the project

Items you’ll need:

1 skein 4ply Yarn (I used red heart super saver black) The whole hat you will double your yarn by using by using both ends of the skein of yarn…I will remind you in the pattern) 🙂


 Also: You can double the 4ply red heart yarn to thicken it so… if you do it that way you won’t need elastic for it and it works up pretty quick!

  • J crochet Hook

  • Tapestry needle

  • Scissors

  • Marker

  • Elastic


Crochet Stitches you have to know:

ch (chain), sl st (slip stitch) , dc (double crochet) , double crochet decrease, HDC (half double crochet), sc (single crochet

Let’s Begin 🙂

Top of the Hat


Ch 12

Row 1: dc in the 3rd chain from the hook, dc in each stitch (11)

Row 2-6 are increase Rows

Row 2: Ch3, 1dc in the ch3 stitch, double crochet in the next 9 stitches, 2 dc in the last stitch (13)

Row 3: Ch3, 1dc in the ch3 stitch, double crochet in the next 11 stitches, 2 dc in the last stitch (15)

Row 4: Ch3, 1dc in the ch3 stitch, double crochet in the next 13 stitches, 2 dc in the last stitch (17)

Row 5: Ch3, 1dc in the ch3 stitch, double crochet in the next 15 stitches, 2 dc in the last stitch (19)

Row 6: Ch3, 1dc in the ch3 stitch, double crochet in the next 17 stitches, 2 dc in the last stitch (21)

Row 7-12 Ch3, dc in each stitch

Row 13-17 are decrease Rows

Row 13-17 you are going to do, *1 double crochet decrease in the beginning and 1double crochet decrease in the last two stitches of each row), ch3, turn* … at the end of row 17    you should have 11 double crochet remaining.

Row 18: dc in each stitch (11)

Get your marker ready…


Working around the hat


Row 19: Ch3, place marker, Dc all the way around the hat (you are double crocheting in your ch 3 spaces) join at the beginning at your chain 3

Row 20-24 (OR when YOU feel is the desire length around the hat): Ch3, dc in each stitch

Time to get your elastic, Measure it around your head , cut and double knot it…

Row 25: Ch1, get your elastic, sc in each stitch while holding the elastic

Row 26-28: Ch1, sc in each stitch

Draw up a tail and cut, you can weave your ends now or wait to do the brim


The Brim


Find the center of your hat and count 8 spaces to the right

Row 1 of the Brim: ch1, 2 sc in the next stitch, *1sc, 2sc*, *Repeat until you have 21sc

Row 2 of the Brim: ch1, in the back loops only, sc in each st , , Hdc in the Row 28 sc stitch, sl st in the next 2 stitches

Row 3 of the Brim: ch1, sc in the next 2 stitches, 2 sc in the next, *1 sc in the next 3 stitches, 2 sc in the next*, Repeat, Hdc in the Row 28 sc stitch, sl st in the next 2 stitches,

Row 4 of the Brim: ch1, sc in each st, hdc in the Row 28 sc stitch, sl st in the next 2 stitches

(Optional) sc all the way around the hat

Draw up a tail a long tail, cut and weave your tail by sealing the center of the top and bottom of the hat where you would normally put the snapper on the hat, and weave any extra ends 🙂

Enjoy your new item 🙂

Peace, Love and Happy Crocheting!


Posted on 12 Comments

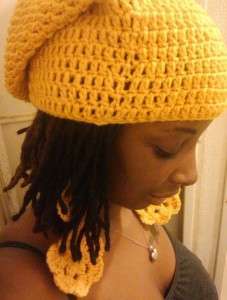
How to Crochet a Extra Slouchy Beanie

I came up with this pattern because, I love when my hats are extra slouchy. So, Since I know how to crochet I’ve decided to create one myself instead of buying them this year :).

Skill Level: Easy 🙂


What you’ll need :

  • Yarn (4ply)Any color you like

  • G/6-4.25mm crochet hook(if you use a bigger size hook it will come out bigger looking like a big tam if you have a smaller hook it will come out smaller)

  • Scissors

  • Tapestry needle

Pattern:

In this pattern you will need to know the basic of crochet

MC- Magic Circle

Ch- Chain

Sl St- Slip Stitch

St- Stitch

SC-Single Crochet

DC- Double Crochet

Lets Begin!

Start with Making a MC

Round 1 : Ch 3 (This will count as a Double Crochet here on out)

DC 10 more times in the Magic Circle (11dc)

Sl St

Round2: Ch3, DC in the same st, 2dc in each st (22dc)

Sl St

Round3: Ch3, DC in each st (22dc)

Sl St

Round4 : Ch3, DC in the same st, 2dc in each st (44dc)

Sl St

Round5: Ch3, DC in each st (44dc)

Sl St

Round6: Ch3, 2DC in the next st, *1dc in next st,2dc in the next st* *Repeat (66dc)

Sl St

Round 7: (Pay close attention in this round!)

Ch3, DC in the same st, 1dc in the next 7 sts, 2DC in the 8th st, *1 DC in the next 7th sts, 2DC in the 8th st*   *repeat 2 more times, 1 DC in each of the remaining sts (70dc)

Sl St

Round 8- 25 – Ch3, DC in each st (70dc)

Sl st

Round 26– SC in each st (70dc)

Sl st

Ch1 drawn up

Cut

Weave All Ends

🙂 And your Project is completed!

Peace, Love and Happy Crocheting <3


© Jessica N. King-Cason

Posted on 1 Comment

Business Card Tip!

This is the time that people are looking for a smarter way to improve there Business cards. So I’ve decide to make my own business cards by going to zazzle.com and creating my vision of how I want my cards to be on there. I wanted a business card I can use in many ways like a, “Business card/Jewelery Holder”.

For my card I decided to use my own logo I created for free online…I forgot the online software…but you can google free logo maker and take it from there. By, making your own logo you save lots of money especially if you are starting your own business. I must warn you some sites say they are free but you have to pay a membership fee! DON’T DO IT!!!!! Go to another site!

Then I decided to created the back of my business cards by using a phrase I love saying when I give a gift to someone and I always say,”Handmade with Love…Especially for you!” just to give my cards a bit of a personalty to it so someone will look back on the card and say, “AWWWWW” 🙂 Last but  not least, I made sure I give my customers three ways to contact me. However, I did not use a phone number. Only because what if I decided to change my number? I’ll have to re-order cards and be stuck with the remaining cards that has my old number.

After I completed everything I order my cards and a week later which is today my cards came! And I’m please with the results 🙂

100 cards for 11.00! (take advantage of promo-codes!)

Posted on Leave a comment

Photos of another Crocheter using my Pattern!

Shamarion Nikki Marcus a Facebook Friend of mines. She had completed her 1st completed crochet project by using my Pattern! https://jesshandmadedesigns.com/2011/04/pretty-in-purple-tamhat/
And She did a AWESOME JOB!

Thank you Nikki for Posting up these pics on FB! Peace, Love and Happy Crocheting!

If you have pics of your crochet work of a pattern that was written by me Please share and I will post it to my Blog 🙂 Thanks in Advance!

Posted on Leave a comment

1st Crochet Swap!

My newsiest thing to do is crochet swap with other crocheters! The 1st person I’ve decided to do a crochet swap  with was a crochet sister on youtube name MzCJA aka IttyBitty! She mentioned me on her blog   and I was so honor of that. She is awesome and one day God willing she will have her own business and I will be ordering from her :). Even thou, I crochet it’s always a great feeling that I get when someone else takes the time to make something for me 🙂

 Profiling in the hat she made for me!

Crocheting Fashionista Jess

I love it sooooooooo Much! She is new to crochet but she’s already a pro! We received our hats 8/15  and I was smiling ear to ear before I even opened my package! I seen the pictures Friday on Facebook and I was smiling ear to ear but when I seen it and I put it on the first thing I said was,”IT FITS!” LOL And I look Hot in it!

And Here’s A Photo of  Itty Wearing the Hat I made for her 🙂

 She Looks Awesome! 

Look for more crochet swaps from me and her soon 🙂

If you are a Crocheter or Knitter and you want to swap Email(CrochetingFashionista@yahoo.com) or Facebook me… I’ll be happy to do a swap with you 🙂

Peace,   Love and Happy Crocheting/Knitting!

Posted on Leave a comment

Crocheting Fashionista’s Latest Crochet work :)

I’ve been working on more of my original patterns and trying my best testing them out. Enjoy some of my Latest Designs! 🙂 Peace, Love and Happy Crocheting! With Love, Philly Crocheting Fashionista


Posted on Leave a comment

The Single Treble Tam Pattern


What you’ll need:
4ply yarn ( I used Red Heart Super Saver Turqua)
J Hook and a I Hook
Marker (you can use a different color of scrap yarn)
Scissors
Tapestry Needle
Click on the Links below to watch the video tutorials of this pattern
How to Crochet a Tam pt 1

How to Crochet a Tam pt 2

Okay now lets get started:

Slip Knot
Chain4
Join

Row 1 : 10 Sc inside the loop
Row2: 2 Sc in each Sc (total of 20)
Row 3: 2 Sc in each Sc (total of 40)
Row 4: Chain 4 (Count as your 1st Treble Crochet ) 1 Treble crochet in the same stitch , 2 Treble crochet in each stitch (total of 80) Slip Stitch
Row 5-11: Chain 4 (Count as your 1st Treble Crochet) 1 Treble in each stitch (total of 80) slip stitch and repeat until you end Row 11
Row 6 (Repeat Row 5)
Row 7(Repeat Row 5)
Row8(Repeat Row 5)
Row 9(Repeat Row5)
Row 10(Repeat Row 5)
Row 11 (Repeat Row 5)

Change your hook (you are now using a I hook)

Row 12: 1 Sc in each Treble crochet
Row 13: 1 Sc in the next four Sc and Slip stitch in the 5th stitch and repeat, slip stitch

Draw up enough tail
Cut
And weave all ends

Peace, Love and Happy Crocheting!

© Jessica N. King-Cason

Posted on Leave a comment

What my Hands Been up to…

I know it’s been a while since I posted on my Blog. However, I’ve been organizing my home alot so I can relax and crochet more during the summer. I’m trying new things like making a Afghan of a cartoon character (Riley, From the Boondocks) for hubby and also learning how create my own afghan using graph paper :).

Also I’ve became a Pescetarian. A Pescetarian is a person who just eat, seafood, vegetables, fruit, nuts, grains, beans, eggs and dairy. Bottom line is, I don’t eat meat. It’s been 6 weeks and four days! And I do feel great!

PICS COMING SOON!

Peace and to all have a Wonderful day!

Peace, Love and Happy Crocheting!

Posted on Leave a comment

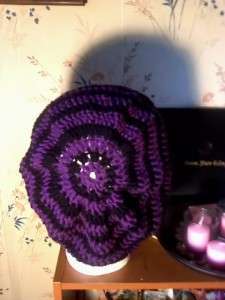
Pretty in Purple Tam/Hat

Here’s a super quick and easy Tam made by me….


I used:

J Hook

2 4ply Red Heart yarn

Color A- Light Purple

Color B- Dark Purple


Color A

Chain 6

slip stitch at the begining of your first chain 1 to form a ring


Round 1 : Color A

Chain 3 (Count as your first double crochet) Double Crochet 9 more times (total of 10)

Slip Stitch

Change Color

Round 2: Color B

Chain 3 Double Crochet in the same Double Crochet , 2 Double Crochet in each Double Crochet (total of 20)

Slip Stitch

Change Color

Round 3:Color A

Chain 3  Double Crochet in the same Double Crochet, 2 Double Crochet in each Double Crochet (total of 40)

Slip Stitch

Change color

Round 4:Color B

Chain 3,  Double Crochet in the same Double Crochet, 2 Double Crochet in each Double Crochet (total of 80)

Slip Stitch

Change Color

Round 5: Color A

Chain 3, 1 Double Crochet in each Double Crochet (Total of 80)

Slip Stitch

Change Color

Round 6 : Color B

Chain 3, 1 Double Crochet in each Double Crochet( Total of 80)

Slip Stitch

Change Color

Round 7-10 Repeat Round 5 &6

Slip Stitch

Change Color

Round 11:

Chain 3

This is your decease row! You’re going to Decrease every 5th Double Crochet!

Slip Stitch

Change Color

Round 12-13:

Chain 3

1 Double Crochet in each Double Crochet

Slip Stitch

Change Color

Round 14:

Sc in each Double Crochet

Slip Stitch and leave a inch of Slack and cut and weave ends!

Peace, Love and Happy Crocheting!
© Jessica N. King-Cason